Photographing the Milky Way
Introduction
It’s a beautiful summer night. You raise your eyes. The Moon is not raised yet. At the zenith, a ribbon of stars stretches from north to south and sparkle with a thousand lights. It is the Milky Way, our galaxy. Its name would come from Greek mythology. Zeus, wanting to make his son Hercules immortal, made him drink the milk of his wife Hera while she slept. When she tore off Hercules from her breast, a giclee of milk spread in the sky and formed the Milky Way.
Like billions of galaxies of its kind, the Milky Way has the form of a disk. As we live “inside”, we see it by the slice. The diameter of the Milky Way is estimated to 100 000 light years (10^17 km!) and it counts about 100 billions of stars. Under a very black sky, this swarm of stars, whose light took several hundred years to reach us, can project your shadow on the ground. This shadow comes from the past. It will be the same when you will photograph the Milky Way: you will make clichés… from the past.
The bulb of the Milky Way
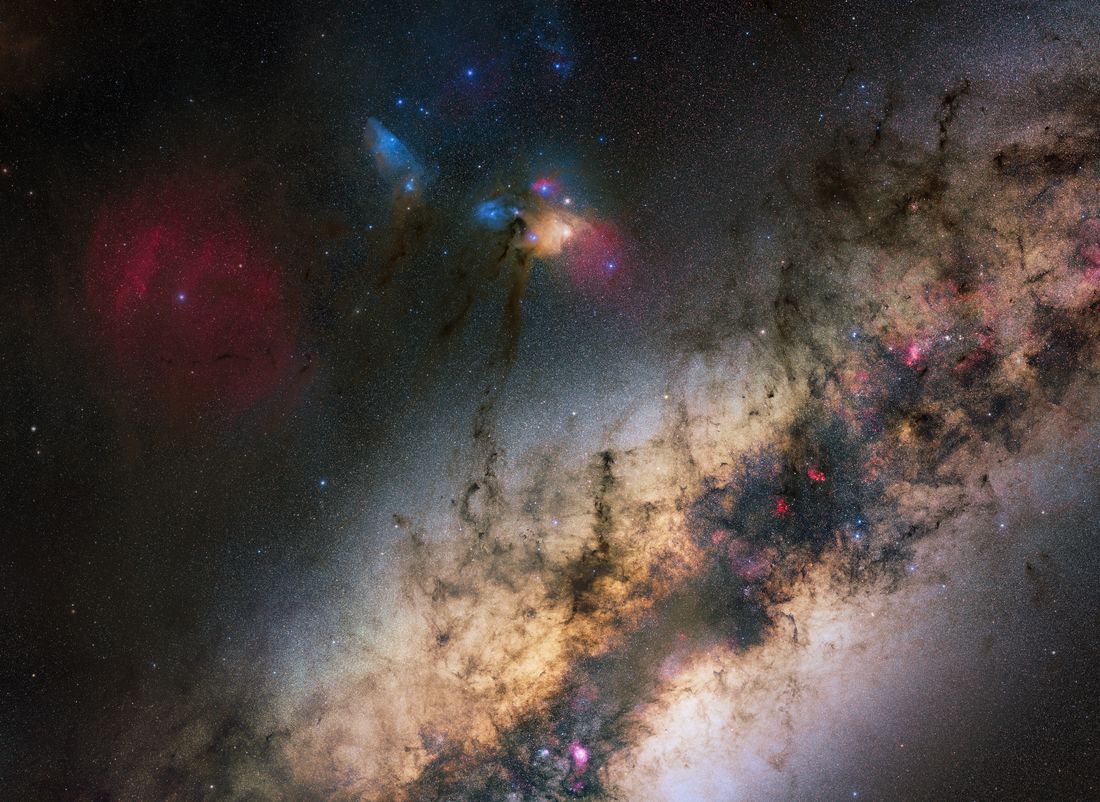
The bulb (or “core”) is the most spectacular region of the Milky Way to observe and photograph. Located between the constellations of Scorpius and Sagittarius, it is very rich in stars, colorful nebulae and dark clouds.
But from the northern hemisphere, we see only one half of the Milky Way. Why? Because wherever the place you are on the planet, it is not possible to see the Milky Way in its entirety. Thus, in the northern hemisphere, the Milky Way is “cut” by the southern horizon at the level of the galactic bulb. If you have the chance to travel to the southern hemisphere, you can admire the bulb in its entirety as it will be higher in the sky. Do not miss the opportunity to isolate you under dark skies to photograph it.
From black and white… to color!
If the Milky Way appears to your eyes in black and white, you will be surprised that your camera, much more sensitive, sees it in color! Especially if you point it in direction of the galactic bulb, which is rich in colorful nebulae and old golden stars.
Prepare your night
How to spot the Milky Way?
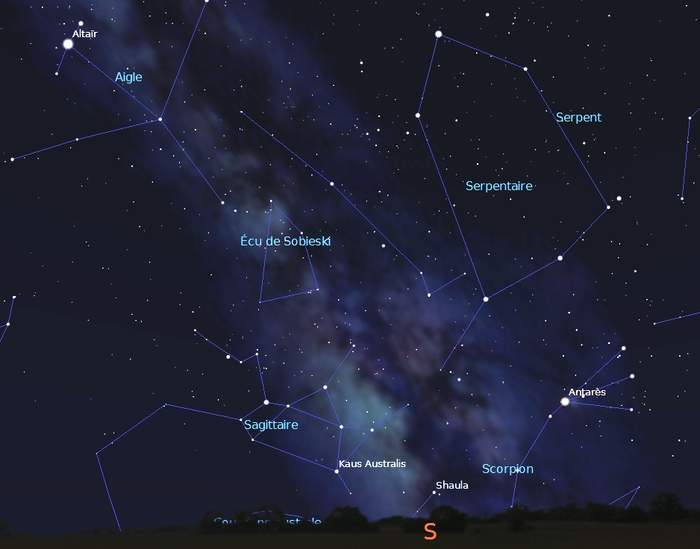
Although the Milky Way is visible a large part of the year in our starry skies, its bulb is visible only from mid-April at the end of the night until mid-September early at night. To find it, locate the Scorpius and Sagittarius constellations (on the southern horizon in the northern hemisphere). You will also have to wait for the Milky Way is high enough in the sky (at least 60° height). Check finally the hours of moonrise and moonset because the Moon will not have to be up when you take your images. You can easily simulate all these settings using a planetarium software like Stellarium or Skycharts.
Where to photograph the Milky Way?
You must spot a place well spared by light pollution. In the northern hemisphere, the southern horizon must be clear to succeed in your clichés of the Milky Way and its bulb. For that, a light pollution map (do an Internet search) will be a precious help. The best places to realize these clichés are the mountainous regions or the areas weakly populated. If you have a little light pollution on your spot, keep in mind that the zenital part of the Milky Way is always very interesting.
How to monitor the weather?
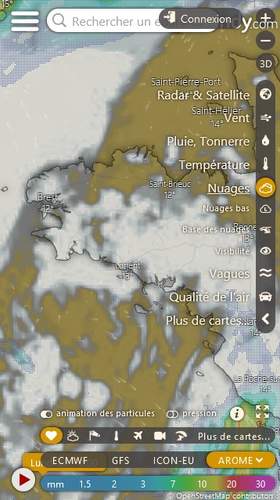
Of course, avoid clouds. Multiply your sources of weather information to get a reliable forecast. I recommend you to check 3 different weather models before planning an astronomical outing. You can do that with the Windy application or website.
Which equipment to use?
Which camera should I use?
Any camera capable of long enough exposures can do the job. But for this very demanding subject, a DSLR or an hybrid camera will be more efficient because often less noisy in high sensitivities. The must is the modded DSLR. Indeed, the intense red of some nebulae is cut off by a filter placed in front of the sensor of your camera. Some companies propose to modify your camera and replace this filter with another one, more tolerant. Attention, after the modification you risk losing the manufacturer’s warranty.
Which photo lens to choose?
It all depends of the photos you want to take. Avoid too long focal lengths (more than 135 mm) because the Earth turns and without tracking device, your stars will become oval in less than 5 seconds. A f/2.8 or less lens is ideal. A less luminous optic may be suitable, provided you climb in ISO sensitivity or multiply the unit exposures.
Which accessories?
A tripod is essential, as well as a remote control to avoid vibrating the device during triggering (use the self-timer otherwise). For panoramic images, a panoramic head will be helpful. Of course, do not forget a second battery and a headlamp (with red lighting). Finally, cover up yourself, because even summer, the nights can be fresh.
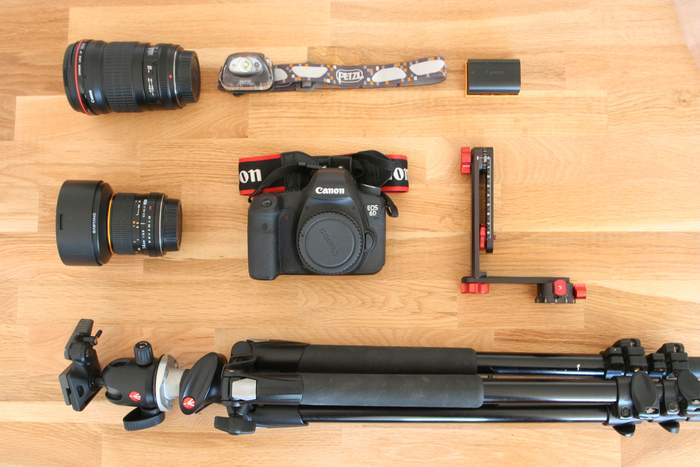
Landscapes and Milky Way
Which settings to use?
Check that your camera is in RAW mode. Otherwise, the compression of images will destroy the weakest stars and your photo will lose details. Open your lens to the maximum. Then determine the ISO setting: on my EOS 6D, I remain the most of the time at ISO 3200.
Last adjustment: the exposure time. Like the Earth turns on itself, the more you will use a long focal length, the more the exposure time must be short to get stars not too oval. You must set a tolerance. With my 14 mm f/2.8 lens I use a time of 25 seconds. With my 135 mm L f/2 lens, the exposure time I use drops to… 5 seconds.
You can get a good indication of maximum exposure time using the rule of “500”: it is equal to 500 divided by the focal length of your lens. Thus, at 17 mm: 500 / 17 = 29 seconds.
How to focus?
The best way is to target a brilliant star and magnify it at maximum using the LiveView. Then do the focus manually: the star must become as small as possible. Be careful if you use a very fast optics (less than f/2.8): the focus is very delicate and there is a risk for your photo to be blurred. Also, the “infinite” position of your lens is rarely the good adjustment.
If you wish to have a sharp foreground:
- Focus on the foreground using a flashlight.
- Use an optic with a short focal length (eg 14 mm) to have both a sharp foreground and small stars: the hyperfocal distance is between 2 and 3 meters for a 14 mm lens set to f/2.8, against about 13 meters for a 24 mm lens set to f/1.4.
Composition
Always connect the starry sky and the Earth: include at least one terrestrial element in your composition. And of course, apply the elementary photographic composition rules (rule of thirds, lines of forces, etc.).
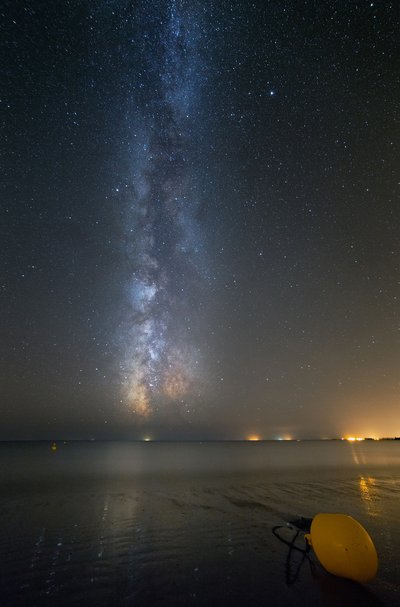
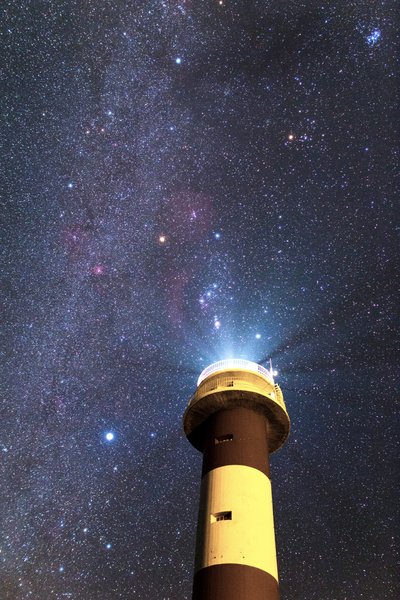
Take series of identical photos to reduce the noise
If you think to take a little time to process your image on a computer, take series of identical photos (same framing, same exposure time, same sensitivity) to reduce the noise of the final image. You can then stack them to simulate a longer exposure.
Image processing
Once your photos are taken, you will need to process them on your computer. I invite you to read the following article: Processing Milky Way images.
Problems and solutions
- My photo is under exposed or too noisy: increase the exposure time, aperture, or ISO sensitivity. You can also multiply the shots to stack them with an image processing software and thus reduce the noise.
- The night is clear, but my photos are “orange”: your spot is probably affected by light pollution. You can process your photo in Photoshop (by decreasing the saturation of the affected area), but nothing will replace a pure dark sky. Note that at the level of the horizon, you will never get a black sky.
Zooming in the Milky Way
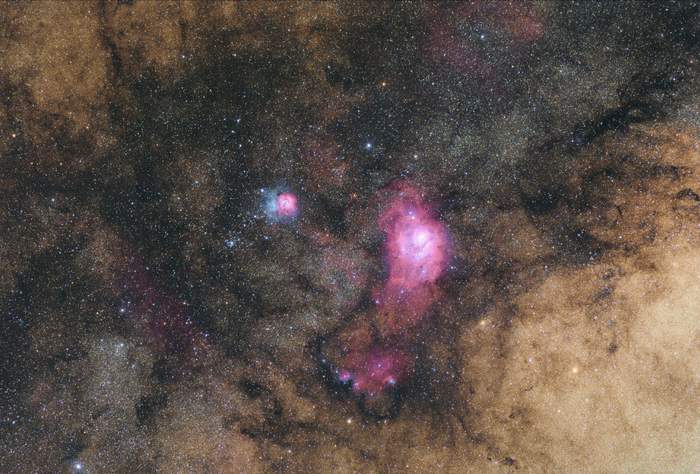
When zooming in some well-known regions of the Milky Way, you will reveal the colors and details of our starry sky. We then approach the (very) vast subject of deep-sky astrophotography…
Equipment
To achieve this type of image, you must use an equatorial mount. This is a motorized system designed to track the movement of the stars in the sky. Once aligned with the celestial north pole (or south pole if you live in the southern hemisphere), an equatorial mount allows you to do long photographic exposures without the stars stretching. They will stay punctual, even with important focal lengths and important exposure times. I recommend you to start with a small equatorial mount that can be mounted on your photographic tripod: Skywatcher Star Adventurer and Star Adventurer Mini, IOptron Skytracker, Vixen Polarie… They cost between € 150 and € 400. For the photographic optics, use a lens of at least 50 mm and sufficiently open (f/4 max).
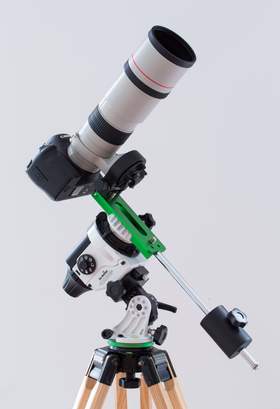
Some target ideas
- In winter: the Orion constellation.
- In summer: the bulb of the Milky Way and the nebulae of the Trifid (M20) and the Lagoon (M8).
- Still in summer: the Cygnus constellation.
- Summer end / start of autumn: the Andromeda galaxy (M31).
- In autumn: the open cluster of the Pleiades (M45).
Not that some targets (the Orion constellation, M31, M45) are located in periphery of the Milky Way disk: use a planetarium software to find them in the sky.
In the field
Before aligning your equatorial mount on the celestial pole of your hemisphere (the polar alignment), you need to balance at best your equipment. Turn the axes of your mount and check that there is no important unbalance. If you use a heavy lens, it is likely that you can not balance your mounting perfectly. You will then have to shorten the exposure times if you have tracking problems (oval stars in the center of the image).
Once balancing is done, you can proceed to polar alignment.
Next, manual focus on a brilliant star and look for the targeted object. This step can be a little laborious, especially if you use a lens with a long focal length and if the object is not visible to the naked eye.
If you think you are on your target, tighten the brakes of your equatorial mount without exaggerating because you will probably have to loosen them to adjust your framing. Increase the ISO setting of your device (12 800 for example) and start an exposure of a few seconds. If you do not see your target, it is likely that you aimed next to it…
Once everything is good, tighten the brakes (always without exaggerating), lower your ISO setting and start your exposures with the unit exposure times listed below. Accumulate unit exposures as much as possible, 2 to 3 hours of total exposure time is a very good work base!
Exposure time
The unit exposure time to use depends on many factors. The main one is the focal length of the lens.
For a small mount like the Skywatcher Star Adventurer, use the following values:
- 50 mm and less: 2 minutes.
- Between 50 mm and 150 mm: 1 minute.
- 150 mm and more: 30 seconds.
Image processing
Realize darks and flats, then stack them with your unit exposures on a computer to get the final image using a software like Deep Sky Stacker.

